Creating a SEPA cancellation

 
Explanation

To create SEPA cancellations you require the following information from the original order:

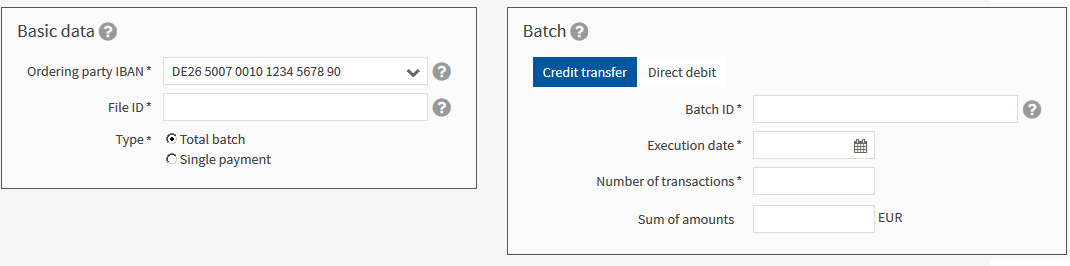
File ID (value from the field Original Message Identifier)

Batch ID (value from the field Original Payment Identification)

Only for cancellations of a single debit: Mandate

Next to most of the fields you will see a . Position the mouse over the question mark. Information about the field is displayed for you.

If the four-eyes principle is activated at your company, two different users must create and send the SEPA cancellation.

Prerequisite

You are authorised to edit SEPA cancellations.

You have the data from the original order.

The ordering party account is permitted for creating SEPA cancellations.

Whether SEPA cancellations are permitted for an account is determined by an authorised user at the ordering party account.

Procedure

1.

Select SEPA cancellations.

2.

Click on .

The empty creation mask opens.

3.

Fill in the fields in the creation mask.

You must fill in at least the mandatory fields indicated with *.

Note:

When you are filling in the fields, the application supports you with input instructions. The instructions are hidden as soon as you have filled in the field correctly.

The following table describes only those mandatory fields of the mask areas which require an explanation:

Mask areas Basic data and Batch

Field name

Description

File ID

Enter the file ID.

Field from the original file: Message Identification

Type

Select whether you want to cancel the entire batch or a single payment from the batch.

If you select Single payment, the application displays a further mask area in which you enter the data for the single payment (see below).

Batch ID

Enter the ID of the batch.

Field from the original file: Payment Information Identification

Credit, Direct debit

Select whether the SEPA cancellation relates to credit(s) or debit(s).

Execution date or Settlement date

Depending on your selection in the field Credit or Direct debit, the field name changes:

In case of a credit, enter the execution date.

In case of a direct debit, enter the settlement date.

Number of transactions

Specify how many single bookings are in the batch.

Mask area Single payment

This mask area is displayed if you have selected the radio button Single payment in the field Type.

Field name

Description

Mandate

Only for debit(s)

Enter the SEPA mandate ID.

The following fields in the area Single payment are not mandatory fields, but they make it easier to assign the operation later on. It is recommended to fill in these fields:

- End-to-end ID

  Field from the original file: End-to-end reference

- Instruction ID

  Field from the original file: Instruction ID

- Purpose

Even if the field you fill in is optional, the content of the field must match the content of the corresponding field from the cancelled order.

4.

If you have cancelled a single payment from a batch with multiple single payments: to cancel further single payments from the same batch, click on Save and create next.

The creation mask opens, in which the mask areas Basic data and Batch are preset.

a)

Enter the data for the next single payment that you want to cancel from this batch in the mask area Single payment.

5.

Save the data.

The application checks whether the data is plausible. If there is an error, the application prompts you to correct the data by issuing an error message.

6.

To create another SEPA cancellation with similar data, click on to duplicate the data record.

A creation mask opens, preset with the data of the duplicated SEPA cancellation.

a)

Modify the data for the SEPA cancellation.

b)

Save the data.

You have completed the creation of the SEPA cancellation. If the four-eyes principle is activated at your company, a different user must send the SEPA cancellation (see section Sending a SEPA cancellation).

If the four-eyes principle is not activated at your company, continue with the sending of the SEPA cancellation (see section Sending a SEPA cancellation).